Are you contemplating the creation of your own DIY adjustable standing desk? It’s a practical solution for revamping your workspace and an opportunity to personalize the desk to match your preferences.
While some construction know-how is beneficial, this engaging project promises long-term benefits for your well-being.
When crafting your adjustable desk, choosing DIY standing desk legs is crucial. Consider using legs that can transition between sitting and standing levels or reach the floor.
The standing desk legs are the foundation of your project, and their sturdiness is paramount. They need to support your equipment without any wobbling or instability.
As you plan your build, keep your specific needs in mind. If you’re unsure about leg types and the construction process, don’t worry—we’ve got you covered with your query.
How do I make a height-adjustable desk? Read on for more information, and enjoy the creative design process!
How do I make a height-adjustable desk? Step by Step Guide
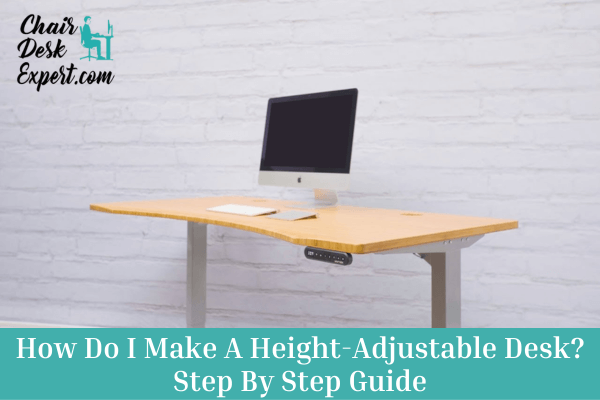
We will guide you through the step by step process so you will find the answer to your query. How do I make a height-adjustable desk?
>> Read Also: How Your Office Chair Can Damage Your Spine
Tools Required:
- 1-1/4″ spade bit
- 1/8″ pre drill bit
- 3/8″ pre drill bit
- Air compressor
- Air nailer
- Drill
- Impact driver
- Mallet
- Miter saw
- Philips bit
- Sandpaper
- Scraper
- Table saw
- Tape measure
- Wood fill
Materials Required:
- 1-1/4-in. 18-gauge brad nails
- 1-1/4″ exterior wood screws
- 2 – 1 x 2 x 8 ft. pine boards
- 2 – 1 x 4 x 8 ft. pine boards
- 3/8-in. dowel
- 4 – 2×4 x 8 ft. spruce boards
- 5 – 1 x 6 x 8 ft. pine board
- 6 – 1 x 6 x 6 ft. pine boards
- Wood glue
>> Read Also: How To Stop Office Desk Chair From Rolling
Choosing the Best DIY Adjustable Desk Legs
Building your adjustable standing desk can be cost-effective, but choosing the right legs is essential. Here are some recommendations for DIY adjustable desk legs:
1. Standard Adjustable Desk Legs:
- Sleek, black, modern design.
- Rapid height adjustment.
- Length: 4-30 inches, Weight Capacity: 220 pounds.
- Easy installation and suitable for various surfaces.
2. Manual Crank Adjustable Desk Legs:
- Sit-stand, manual crank-style.
- Adjustable from 30 to 48 inches.
- Weight: 132 pounds, easy installation.
- Ideal for budget-conscious DIY projects.
3. Folding Telescopic Desk Legs:
- Telescopic design for a fold-away wall desk.
- Weight: 176 pounds, easy installation.
- Suitable for small spaces with a narrower desk length.
4. Electric Adjustable Desk Frame:
- Premium option with power lift.
- 8 inches of adjustment range, 176 lb. weight capacity.
- Suitable for L-shaped and regular desks.
- Sturdy design with easy setup.
5. Classic Schoolroom Adjustable Desk Legs:
- Telescopic with an adjustment range of up to 30 inches.
- Heavy-duty design with simple installation.
- Budget-friendly alternative with fixed adjustments.
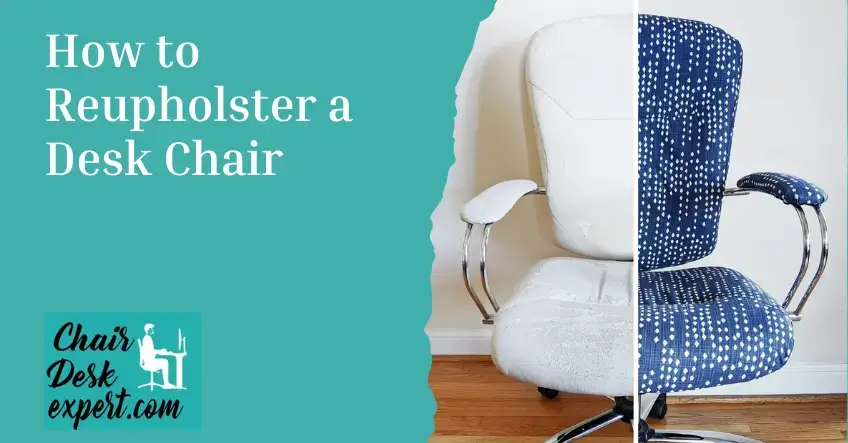
>> Read Also: How To Reupholster A Desk Chair
Desk Project: Step-by-Step Guide
Step 1: Build the Inner Legs
- Cut two 2x4s to 27-1/2 inches.
Step 2: Build the Boxes For the Legs to Slide Into
- Cut four 1×6 (6 ft.) to 25 inches for the outside of the boxes.
- Cut two more 1×6 to 25 inches.
- Cut four strips for the inside of the box to 1-3/4 inches.
- Glue, pin nail, and clamp each box.
- Let that dry overnight.
Step 3: Build the DeskTop
- Cut three 1×6 (8 ft.) to 48 inches.
- Glue each edge and clamp five 48-inch. Planks edge to edge (use a mallet to hammer lightly to make them as even as possible).
- Let everything dry overnight.
- The next day, remove the top clamps and run each edge through a table saw to get a cleaner, more uniform edge.
Step 4: Check the Fit By Putting the 2×4 Legs Into the Box.
- Assemble the desk by inserting the 2×4 legs into the boxes and checking the fit. Adjust if necessary to ensure a snug fit.
- This completes the initial steps of building your DIY desk. Ensure proper drying times for glued components and take care when assembling the boxes and desktop for a sturdy and polished result.
>> Read Also: How To Fix A Sinking Desk Chair
Step 5: Add Edging to Your Desktop
- Cut two 1×2 pieces to 27-3/4 inches.
- Cut two 1×2 pieces to 48 inches.
- Glue, pin-nail, and clamp the 1x2s to each edge, leaving a slight lip underneath.
- Let that dry for the day.
Step 6: Build the Legs
- Cut two base planks out of 2×4 to 28-1/2 inches.
- Adjust the box height to 23-1/2 inches by cutting 1-1/2 inches off the boxes due to the added height of the base.
Step 7: Attach the Boxes to the Base
- Measure 17 inches to the far side of the box from the closest edge of the base.
- The middle measurement is 14-1/4 inches, then add the other half of the box (17 inches).
- Flip those upside down, glue them, and pre-drill with a 1/8-inch bit.
- Use four 2-inch screws to secure the box to the base.
Step 8: Prepare for the Pegs
- Drill large holes for the pegs using a 1-1/4-inch spade bit.
- The holes should be located 2 1/2 inches and 6 1/2 inches from the top of the leg box.
- Use the same spade bit to drill two holes 2 1/2 inches and 6 1/2 inches from the bottom of the 2×4 inner leg.
Make the Pegs
- Cut four pieces at 3-1/2 inches each from the 3/8-inch dowel.
- Clamp them and drill a 3/8-inch hole in each.
- Put a dab of glue into the small hole.
- Slide four pre-cut 3-1/2-inch dowel pieces into each existing hole.
>> Read Also: How To Fix Desk Chair Hydraulics
Step 9: Moment of Truth
- Check if everything is even and fits together!
Step 10: Add Some Support to the Desktop
- Using the leftover drop-off cuts from the 2×4 legs, cut a 50-degree angle on four pieces.
Cut the other edges at 45 degrees.
- You should end up with a “Y” pattern for extra support.
- These steps will further shape and strengthen your DIY desk, ensuring stability and durability. Proceed with precision and enjoy the crafting process.
Step 11: Attach the Supports
- Screw the bottom of each brace into the leg using one 2-inch screw per side.
- Predrill with the 1/8-inch bit.
Step 12: Add Some Extra Support
- Add a 1×8-inch brace to tie it all in.
- Use four 1-1/4-inch screws to secure the brace.
Step 13: Secure the Desktop
- Find the center of the top and make sure the top of the Y brace lines up.
- Use 1-1/4-inch screws in the two angled pre-drilled holes.
- Use 2-inch screws for the other predrilled holes.
- Use wood fill to cover up the screw heads and to clean it up a bit.
Step 14: Add a Brace Across the Top of the Box Legs for Extra Support
- Cut a 2×4 at 41-3/4 inches.
- Attach it with 2-inch screws from the inside of the top of the box and toenail from underneath.
Step 15: Put It All Together
- Sand edges to avoid slivers.
- Step 16: Enjoy the Finished Product!
- Congratulations on completing your DIY desk project.
>> Read Also: How To Buy A Good Home Office Desk
Pros and Cons of An Adjustable Standing Desk
Pros
1- Calorie Burn:
>> With a height-adjustable desk, you can burn calories; thus, it is a more active alternative to active sitting.
2-Reduced Aches and Pains:
>> An adjustable standing desk reduces the risk of health issues like back, neck, and shoulder pains.
3-Improved Posture:
>> It improves posture by promoting natural body position and increasing cognitive function.
4-Enhanced Blood Flow:
>> Standing desks encourage movement and prevent prolonged periods of inactivity, supporting healthy blood circulation in the core, legs, and glutes.
5-Increased Productivity:
>> Standing desks can break the sedentary work style, boost mental alertness, improve focus, and contribute to overall productivity.
6-Healthier Lifestyle:
>> Standing desk promotes a healthier lifestyle as the body remains in movement. It reduces the negative effect of prolonged sitting.
Cons
1-Muscle Strain:
>> Standing for extended periods can strain muscles and exert pressure on the knees, potentially leading to chronic health conditions and discomfort.
2-Adjustment Period:
>> Shifting from a sedentary work routine to an adjustable standing desk may require an adjustment period. Initial discomfort can be mitigated by gradually incorporating standing sessions into the daily schedule.
3-Posture Challenges:
>> Without features to correct alignment, there’s a risk of adopting poor posture habits when using a standing desk. Users need to be conscious of maintaining proper posture during standing sessions.
Final Thoughts
We hope now you will be well aware and find the answer to the question: How do I make a height-adjustable desk? Building a height-adjustable desk can be a rewarding and customized solution for individuals seeking a versatile and ergonomic workspace.
Following the step-by-step guide and utilizing the specified tools and materials, one can create a functional desk tailored to personal preferences.
The process begins with constructing the inner legs, creating boxes for the legs to slide into, and assembling the desk’s top.
Attention to detail, such as checking the fit by inserting the legs into the box, ensures a seamless construction.
Adding edging to the desktop and building the legs further contribute to the desk’s stability and aesthetic appeal.
Including adjustable features, such as pegs and additional support, enhances the desk’s adaptability to different heights and user needs.
Careful consideration of measurements and angles during the support attachment and bracing stages contributes to the desk’s overall stability.
Moreover, the step-by-step guide emphasizes the importance of proper attachment, secure fastening, and diligent preparation for each stage of construction.
From attaching supports and braces to securing the desktop and adding final touches, these meticulous steps ensure a well-crafted, durable, height-adjustable desk.
In exploring adjustable desk leg variations, the guide provides insights into different types, such as pin-style legs, telescoping legs, electric-powered legs, fold-away legs, and manual crank legs. Each variation offers unique benefits, catering to diverse preferences, budgets, and space requirements.
Finally, the guide highlights the variety of adjustable desk legs available in the market, offering options like Smart Desk Frame, manual crank legs, electrically adjustable desk frames, and more.
Choosing the suitable desktop material and design complements the elastic legs, ensuring a harmonious and functional outcome.
FAQ section :How do I make a height-adjustable desk?
Q-1 Can you make any desk adjustable?
By placing a standing desk converter on your existing desk or table, you can easily transform any traditional desk into a height-adjustable workstation. Simply add the detachable keyboard tray and set it to your desired height for a quick conversion.
Q-2 How do you make an elevated desk?
Take a standard desk and extend its legs to raise the top, creating a more comfortable standing height. During the modification process, consider adding a shelf for storing a printer and office supplies.
Q-3 How do you turn a normal desk into a standing desk?
To turn a regular desk into a standing desk, try stacking books under your keyboard or screen to increase their height. Alternatively, use a smaller table or tray on your desk to create extra height, allowing you to stand while working.
Q-4 Are standing desks practical?
Yes, standing desks are practical and have been shown to help ease back pain. Studies indicate that employees with standing desks can be up to 45% more productive daily compared to those who sit during their shifts.
Q-5 Is standing for 8 hours bad?
Standing for prolonged periods, especially without breaks, may lead to issues such as blood pooling in the legs, varicose veins, and joint stiffness. It’s recommended to incorporate movement and sitting breaks to avoid potential health issues.